This guide focuses on the publication settings for Prestashop, WooCommerce and Magento, so it only explains how to fill in the sections available for this specific sales channel.
If you want guidance on all sections of the publication settings, including those not available for this e-commerce site, read the guide How to publish a catalogue.
N.B. Before you can publish sales channel, you must configure the catalogue. If you have not already done so, click here to find out how to proceed.
Contents
Introduction
Publishing a catalogue on marketplaces or e-commerce sites involves two key steps:
1. Applying the publication settings
In this process, the key elements for the publication of products are defined: prices and mark-ups, shipping costs, payment methods and much more.
2. Applying the include and exclude filters
In this phase you must finalise the publication, by setting include and exclude filters in the Filters tab to establish which products to publish and which to exclude from publication
Below we see in detail how to apply the settings and how to finalise the publication of a catalogue.
Publication settings
Defining publication settings is the first step towards publishing a catalogue.
To apply the publication settings, follow these steps:
1. Got to Pre-sales > Products, select the catalogue to be published, click on ![]() Settings and then on New.
Settings and then on New.
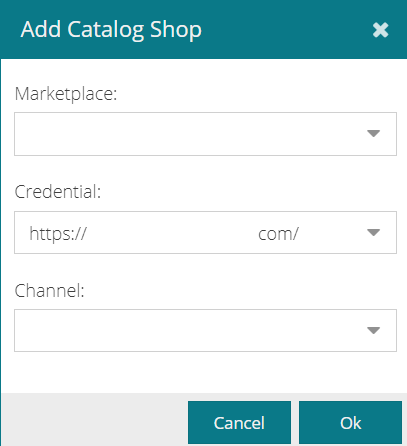
Indicate the sales channel you would like to publish on; in this case:
- Marketplace: select the sales channel.
- Credential: the already configured credential appears. If you have configured more than one credential, choose the one you want to use
- Channel: If your site has multiple languages, choose the language in which you want to publish your products.
Click on OK.
 |
A row will be created with the sales channel attached. The status will initially be red; you need to apply the publication settings for it to turn green.
2. Click on the dial ![]() . A window will open showing the settings to be applied in order to publish the products on the sales channel.
. A window will open showing the settings to be applied in order to publish the products on the sales channel.
Let us see in detail how the publication settings work.
General rules vs specific rules
Before defining the settings, it is essential to understand how the various tabs to be filled in are built, and, in particular, what the difference is between general and specific rules.
- General rules: these are set at the top of each tab. They are rules that apply to all products you publish on any given sales channel.
- Specific rules: these are set at the bottom of each tab. They are applied only to products that fall within the parameters you have specified.To set a specific rule:
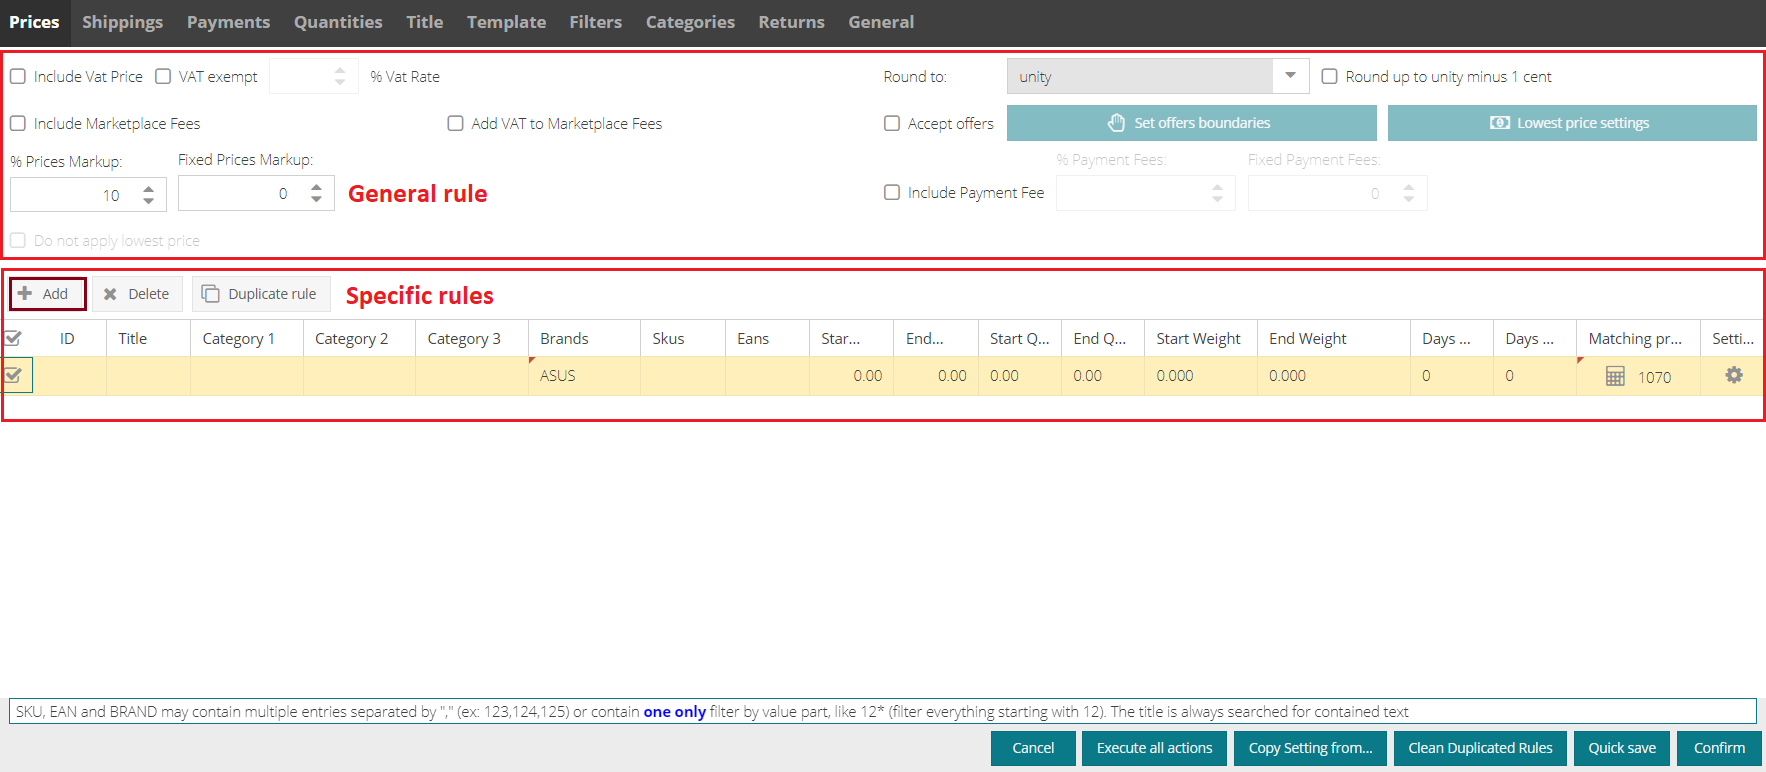
1. Click on the New button. A row is created, indicating the products to which the rule will be applied.
 |
The products to which the rule is to be applied can be filtered using the following parameters:
- Category 1 and/or 2 and/or 3
- Brand
- Individual or Groups of SKU
- Individual or Groups of EANS
- Price ranges
- Weight ranges
- Order preparation day ranges
2. When you have defined the parameters, click on Settings in the same row.
This will open a window where you can set the rule that will be applied to products falling within the scope of the parameters of that row.
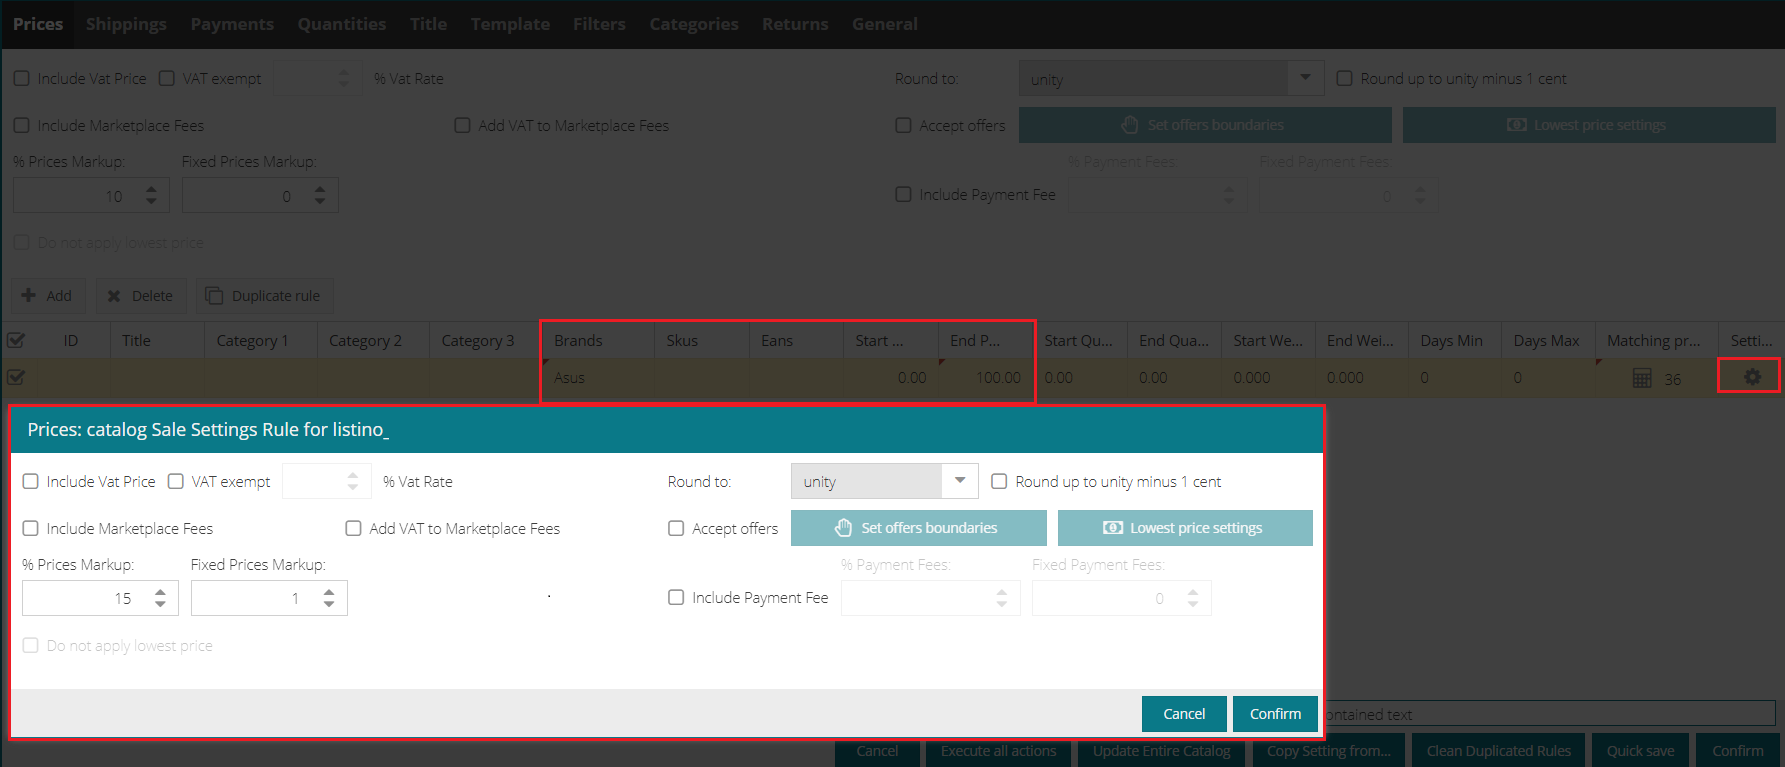
Example: a 15% mark-up and fixed mark-up of € 1 will be applied to all Asus brand products between € 0 and € 100.
If one or more products fall within the parameters of multiple rows, the applicable rule will always be that of the highest row.
Drag upwards or downwards to change the order of the rules.
How to fill in publication settings tabs
Once you understand how general rules and specific rules work, you can go on to define the settings.
Bear in mind that the fields to be set may vary depending on the marketplace: when a section is not editable, it means that it cannot be managed for that specific channel.
Let us see in detail how to fill in each section:
Prices
In the Prices tab, you can manage various settings related to the price of the products to be published.
 |
The fields to be filled in and the options that can be enabled in this tab are listed below:
1. Adding VAT to the price
To add VAT to the price, flag this section and indicate the VAT percentage, if applicable.
Bear in mind that prices upstream of listings are generally exclusive of VAT.
But if, upstream in the catalogue, there is a column with a value stating the VAT percentage, do not flag this box: the system will add the VAT to the final price in the catalogue.
2. Rounding off
You can choose to round the price to the decimal place (e.g. € 11.70) to the unit (e.g. € 12), or to the unit minus one cent (e.g. € 11.99).
3. Percentage price mark-up and fixed price mark-up
You can enter a percentage and or fixed mark-up to be added to the list price. To apply a discount, enter a minus sign in front of the mark-up (e.g. “-5.00”).
All calculations are made using the catalogue currency.
At the time of submission, SellRapido converts the amounts to the currency of the target marketplace. For this reason, fixed mark-ups must always be in the currency of the listing.
4. Specific rules
As with any tab, at the bottom of the page you can set specific rules for groups of products that meet certain criteria (go back to the section general rules vs specific rules to recall in detail how to do this).
Shipping
N.B.: there is no Shipping section in Magento
In the Shipping section you can set your shipping costs and order preparation times.
 |
The customer will not see the actual shipping costs.
Sellrapido NEVER sends shipping costs to any e-commerce site; these must be set using specific rules on the e-commerce site.
Quantities
On this tab you can set the quantity of products that will appear in the ad.
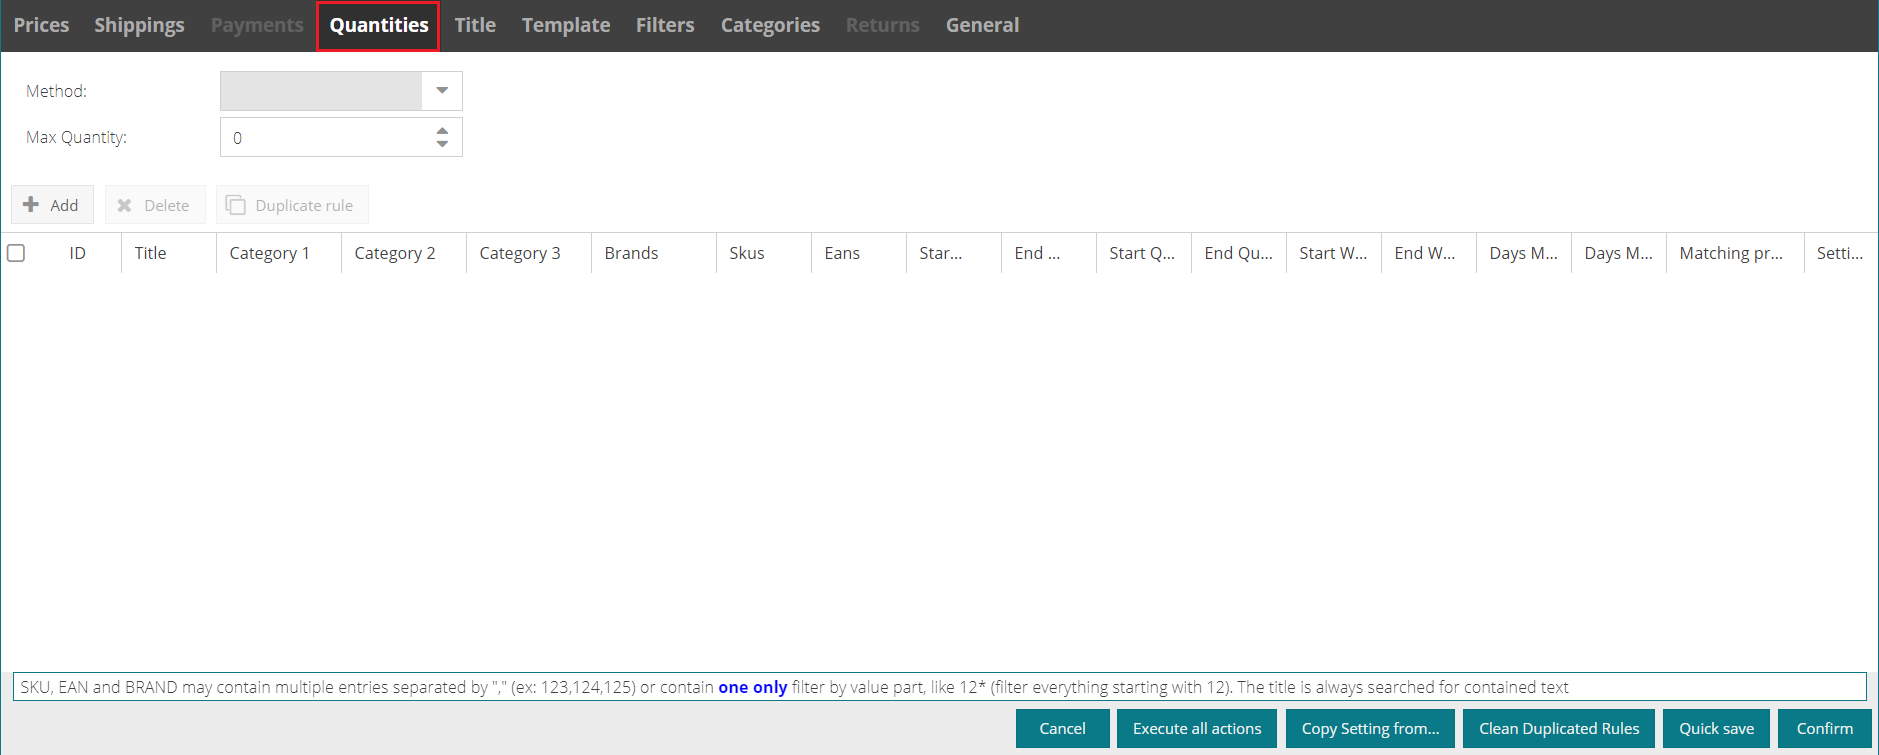 |
There are 3 ways to manage this data (selectable from the Method drop-down list ):
- import the quantities from the listing
- set a fixed quantity by entering the number of pieces to be displayed in the field.
- set a random quantity to publish a random quantity within the range of the two numbers entered in the two boxes.
You also have the option to set a maximum quantity of pieces to be displayed in the ad.
Title
In this tab you can customise the title of your ads.
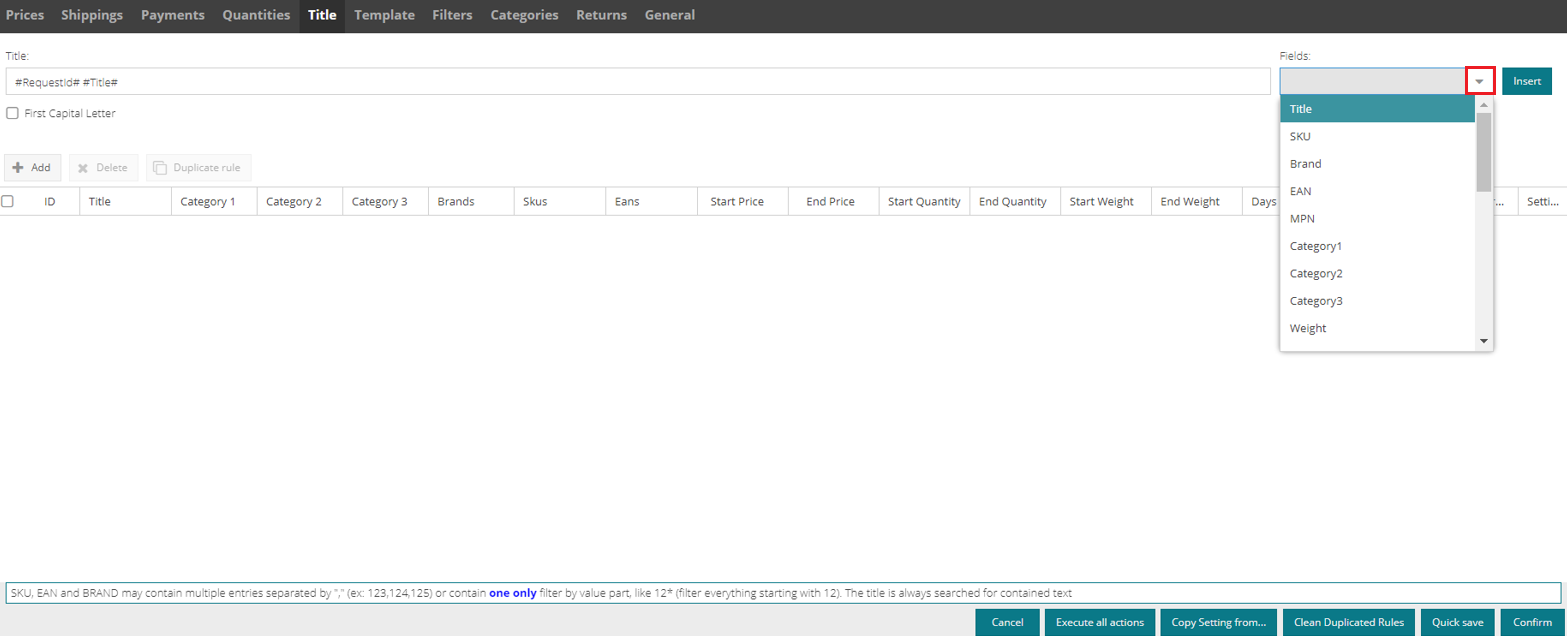 |
1. Adding a field
To add one or more fields to the title of your ads, click on the drop-down menu in the Fields section at the top right.
Each field is delimited by the hashtags #.
At the time of publication, SellRapido will automatically populate the ad title by replacing the field names with the relevant value (taken from the path upstream of the listing).
N.B.: a space must always be inserted between fields.
Example:
#SKU# #Title#
2. Capitalise first letter
If you want the first letter of each word in the title to be capitalised, flag the Capitalise first letter box.
 |
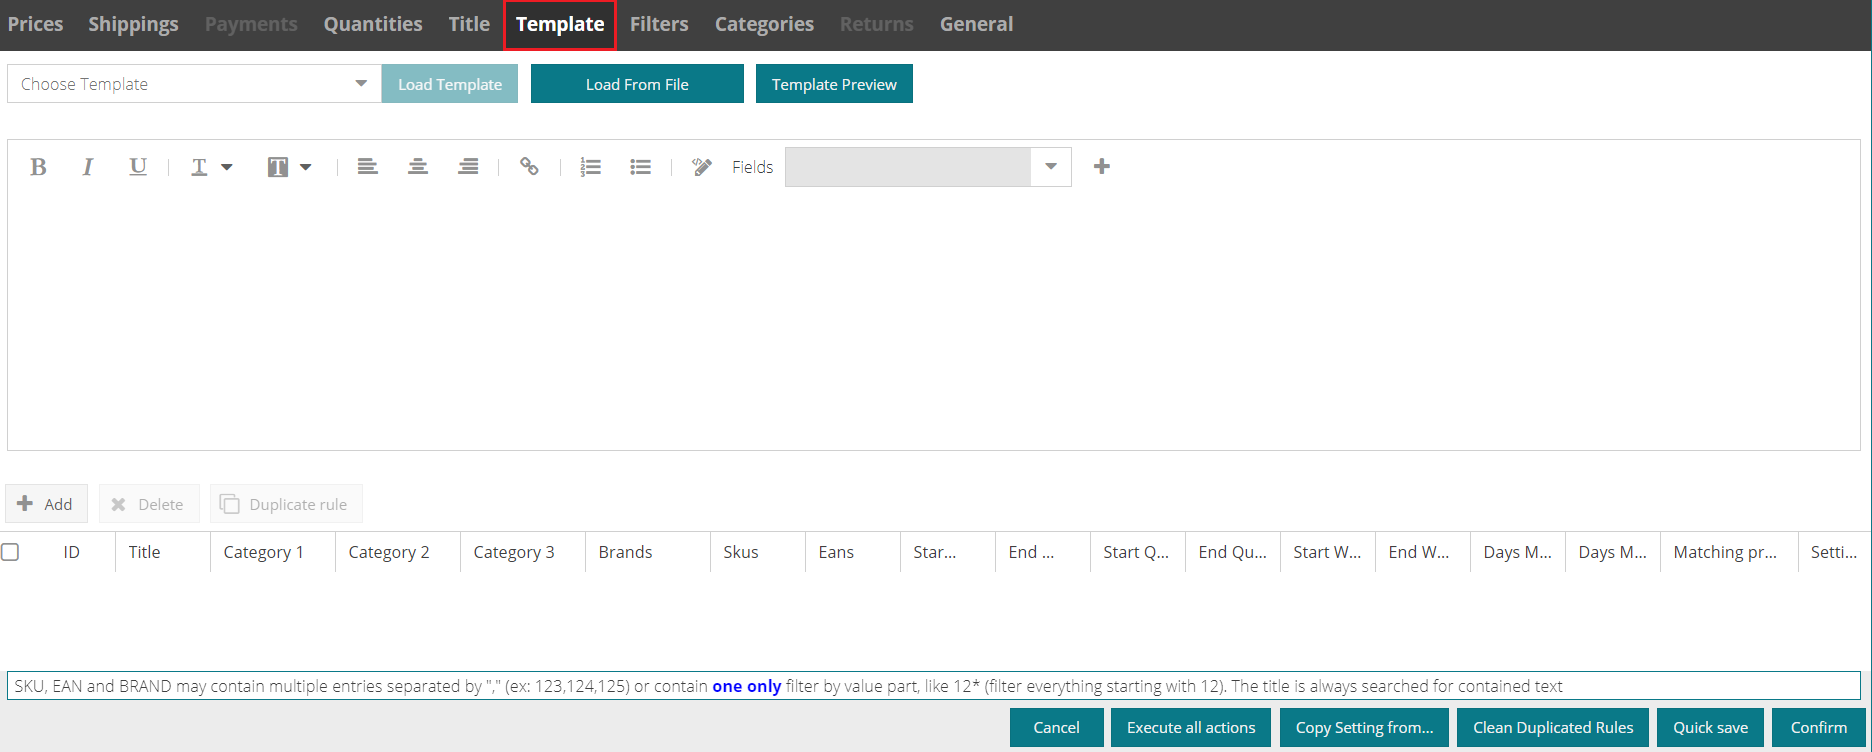
Template
In the Template tab, the description of the adverts can be customised.
 |
The options available for customising the description are:
1. Adding a field
To add one or more fields to the description of the ads, click the drop-down menu in the Fields section at the top right.
N.B.: the template must have a maximum of 40,000 characters
The following fields can be entered:
|
Field name |
Explanation |
|
#Category1# - #Category3# |
Listing categories |
|
#Title# |
Title |
|
#Description# |
Description |
|
#SKU# |
SKU code |
|
#EAN# |
EAN code |
|
#MPN# |
Manufacturer code (MPN) |
|
#Brand# |
Brand |
|
#Image1#– #Image9# |
Image URL (from 1 to 9) |
|
#extra1# – #extra9# |
Extra fields (from 1 to 9) |
When you have filled the desired fields, click on Confirm at the bottom right to save your settings
2. HTML code
To use it HTML code, click on the Source Code button ![]()
3. Importing a file
To import a file (HTML or text) saved on your computer, use the Upload from file button; choose the file from its folder, and click on Open.
4. Preview the template
You can preview the template by clicking on Preview template.
Filters
In this tab you can finalise publication on the sales channel by setting filters to include or exclude certain products from publication.
To see in detail how to do this, go to the section Publishing the catalogue.
Categories
In the Categories tab, you must associate Categories 1/2/3 (i.e. those in the upstream listing) with Store Category 1/2/3.
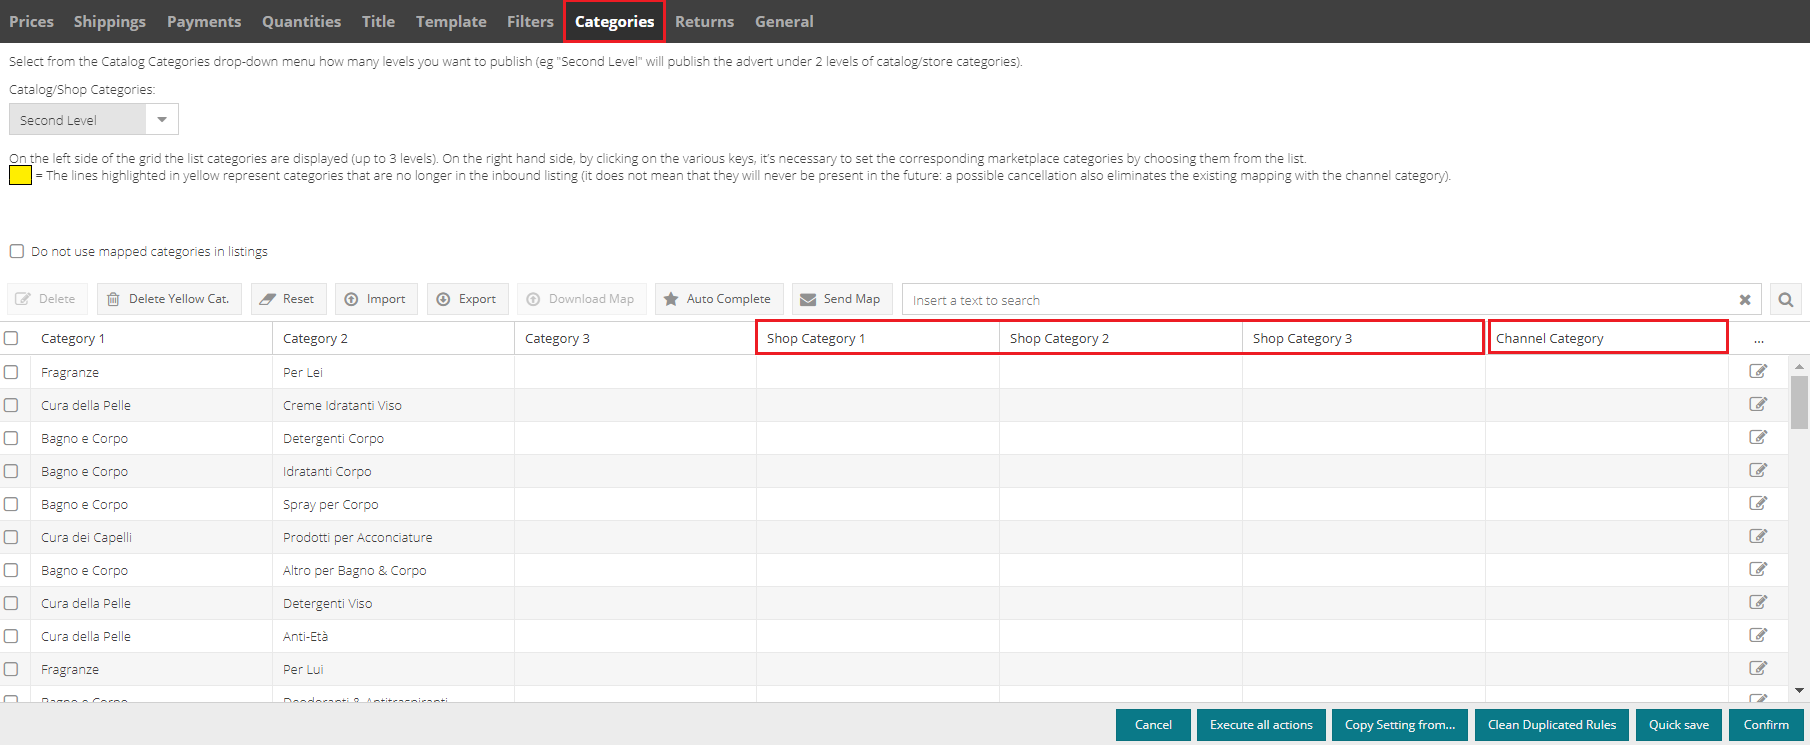 |
It is mandatory to map at least one store category level.
To do this, follow these steps:
1. From the Catalogue/Store categories drop-down list, select how many levels you want to publish (e.g. “Second Level” will post Store categories 1 and 2).

2. Map the Store categories.
Mapping can be performed by:
- Manually typing the figure in the Store category 1/2/3 columns
- In bulk by loading an Excel file
To map categories in bulk:
3. Click on Export (1).
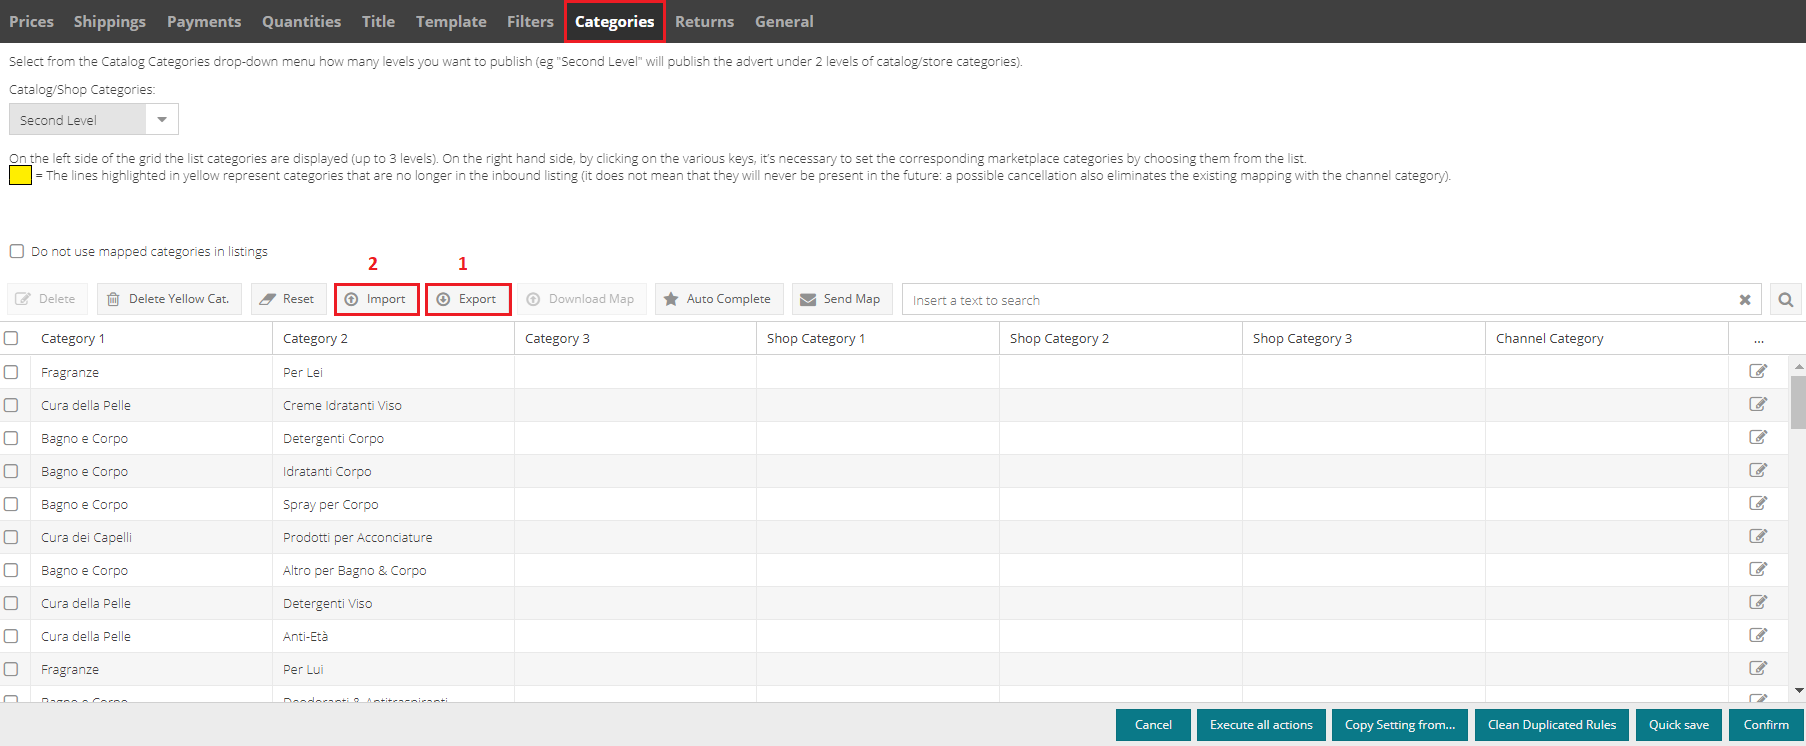
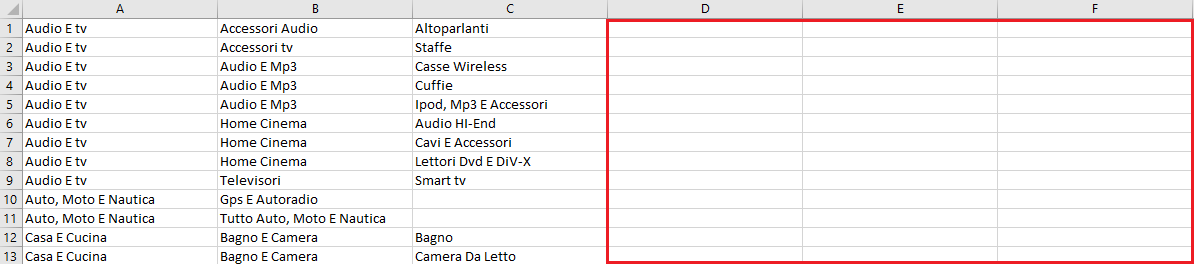
An Excel file will be created where categories 1/2/3 correspond to columns A/B/C while columns D/E/F are store categories 1/2/3.
Fill columns D/E/F of the Excel file with the store categories to be created on the website and save the file.
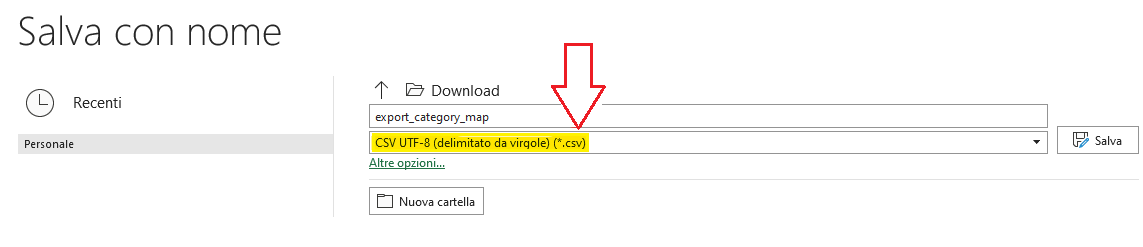
When there are accented letters (è,à,ù, etc.) it is not sufficient to save the file as a normal CSV (in this case the fonts would not import correctly).
The file will then be saved in CSV UTF-8 comma delimited format.
4. Go back to SellRapido, click on Import (2) and choose the Excel file you saved on your PC to import the mapping.
Store categories 1/2/3 will be given values of the data taken from the imported Excel file.
General
On this tab, you can flag Maintain relevance to keep an out of stock product ad active.
N.B.: this option does not work for products with variants.
Publishing the catalogue on a sales channel
As explained in previous sections, a catalogue is published by inserting an include filter.
In the Filters tab, Include or Exclude filters must be set to identify which products to publish and which to exclude from publication.
 |
Products can be filtered under the following parameters:
- Category 1 / 2 / 3
- Brand
- SKU
- EAN
- Price range
- Min./max. quantity
- Weight range
- Order preparation day ranges
Products on the listing that match the Include rules will be published, while products that match the Exclude rules will not be published.
To create a new rule, click on New and set the parameters to filter the products.
Example:
In the example image, all products that meet the following parameters will be published:
- Category 1: Cosmetici
- End Price: 100
- Start Quantity: 20
- Matching products: 905
Under this rule, the system will then publish all products between € 0 and € 100, belonging to the Cosmetici Category 1, and a Start Quantity 20.
Include/exclude by brand
To include or exclude products of different brands, enter their names (including any spaces, e.g. Infinity Light) in the Brands field, separating them with a comma.
N.B.: there should be no spaces before and after a comma.
Example: canon,infinity light,zyxel
Checking the ad reports
After publishing a catalogue, it is essential to monitor the Ad Reports to check the status of publications.
This is a very important step, as it will allow you to detect any errors and make the necessary changes for successful publication of products.
Click here to read the guide on checking your Ad Reports.