Contents
1. Introduction
2. Publication settings
a. General rules vs specific rules
b. Prices
c. Shipping
d. Payment
e. Quantity
f. Title and Template
g. Filters
h. Categories
i. Returns
3. Publishing the catalogue on a sales channel
4. Checking the ad reports
Introduction
Before you can publish products on a marketplace/e-commerce site, you must have at least one sales channel configured and at least one catalogue uploaded. To see how to do this, read the guides in the section Configuring sales channels and Uploading and managing catalogues.
Publishing a catalogue on marketplaces or e-commerce sites involves two key steps:
1. Applying the publication settings
In this process, the key elements for the publication of products are defined: prices and mark-ups, shipping costs, payment methods and much more.
2. Applying the include and exclude filters
In this phase you must finalise the publication, by setting include and exclude filters in the Filters tab to establish which products to publish and which to exclude from publication
Below we see in detail how to apply the settings and how to finalise the publication of a catalogue.
Publication settings
Defining publication settings is the first step towards publishing a catalogue.
To apply the publication settings, follow these steps:
1. Go to Pre-sales > Products, select the catalogue you want to publish and click on ![]() Settings.
Settings.
 |
2. Click on New.
 |
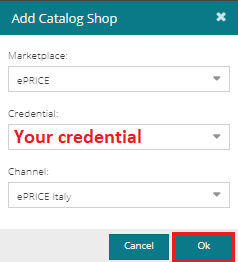
A screen will appear where you can select the sales channel on which you want to publish the catalogue.
The fields shown in the screen are:
- Marketplace: select the channel on which you want to publish the catalogue.
- Credential: this field will automatically be populated with the account details previously configured under Settings > Marketplace Credentials.
- Channel: select the country where you want to publish the catalogue.
Click on OK.
 |
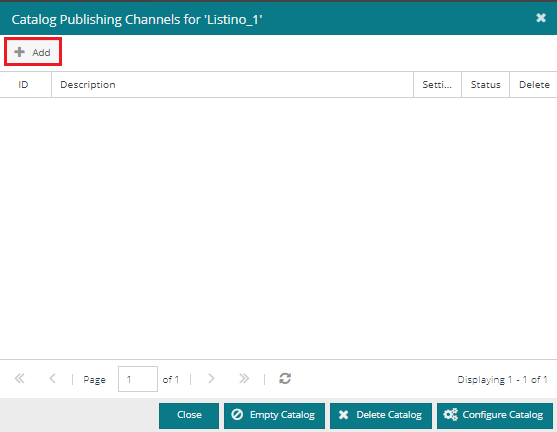
A row will be created with the sales channel attached.
 |
The status will initially be red; you need to apply the publication settings for it to turn green.
3. Click on the dial ![]() . A window will open showing the settings to be applied in order to publish the products on the selected sales channel.
. A window will open showing the settings to be applied in order to publish the products on the selected sales channel.
Let us see in detail how the publication settings work.
General rules vs specific rules
Before defining the settings, it is essential to understand how the various tabs to be filled in are built, and, in particular, what the difference is between general and specific rules.
- General rules: these are set at the top of each tab. They are rules that apply to all products you publish on any given sales channel.
- Specific rules: these are set at the bottom of each tab. They are applied only to products that fall within the parameters you have specified.
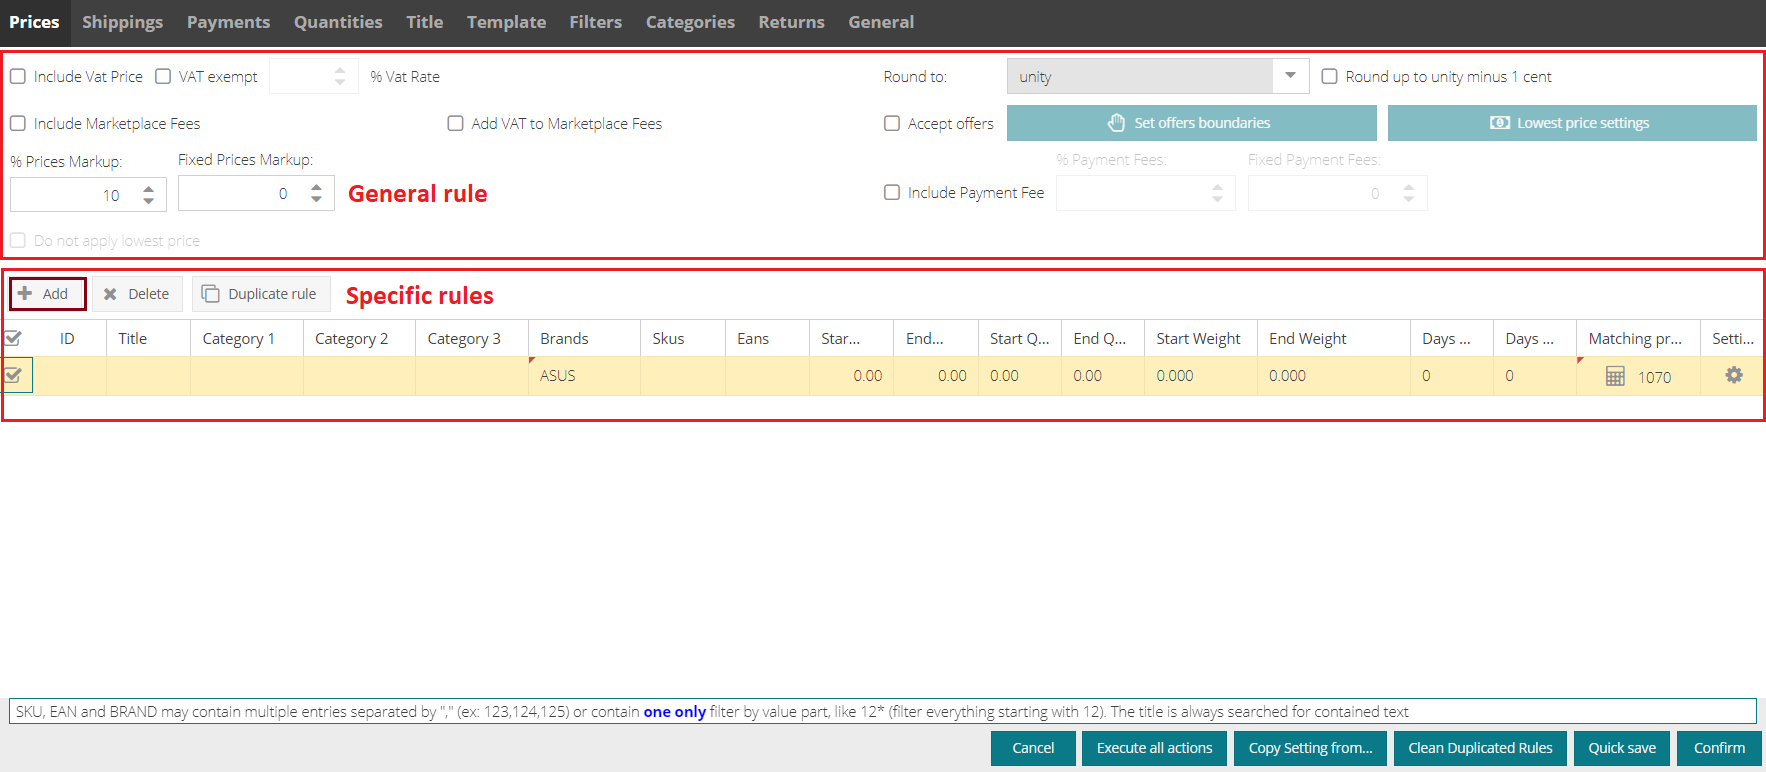 |
To set a specific rule:
1. Click on the New button. A row is created, indicating the products to which the rule will be applied. |
The products to which the rule is to be applied can be filtered using the following parameters:
- Category 1 and/or 2 and/or 3
- Brand
- Individual or Groups of SKU
- Individual or Groups of EANS
- Price ranges
- Weight ranges
- Order preparation day ranges
2. When you have defined the parameters, click on ![]() Settings in the same row.
Settings in the same row.
This will open a window where you can set the rule that will be applied to products falling within the scope of the parameters of that row.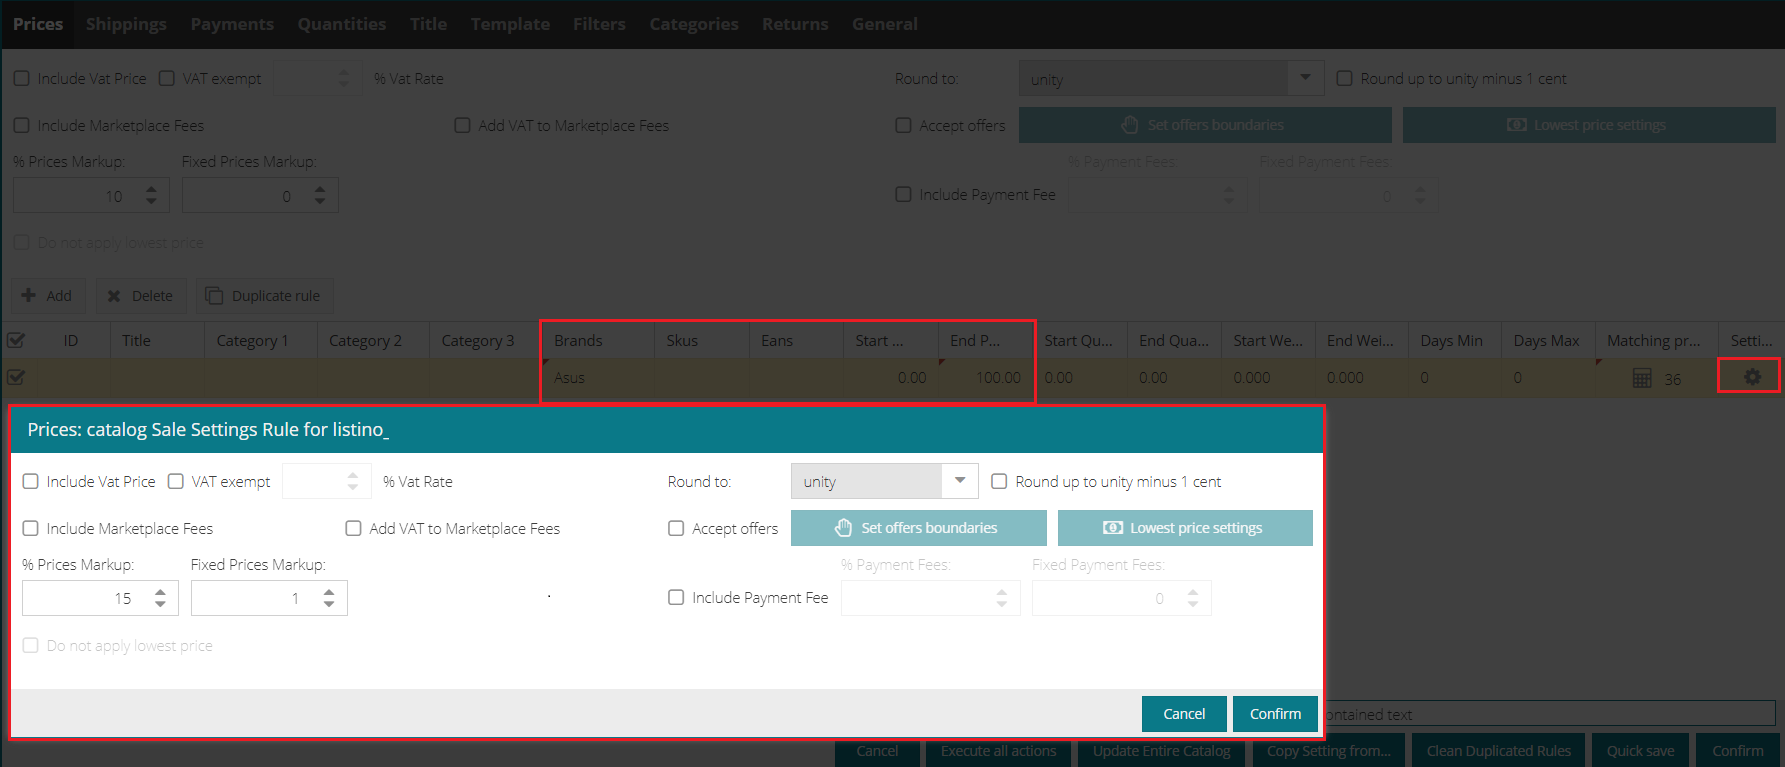
Example: a 15% mark-up and fixed mark-up of € 1 will be applied to all Asus brand products between € 0 and € 100.
If one or more products fall within the parameters of multiple rows, the applicable rule will always be that of the highest row.
Drag upwards or downwards to change the order of the rules.
How to fill in publication settings tabs
Once you understand how general rules and specific rules work, you can go on to define the settings.
Please bear in mind that the fields to be set may vary depending on the marketplace: when a section is not editable, it means that it cannot be managed for that specific marketplace.
Let us see in detail how to fill in each section:
Prices
In the Prices tab, you can manage various settings related to the price of the products to be published.
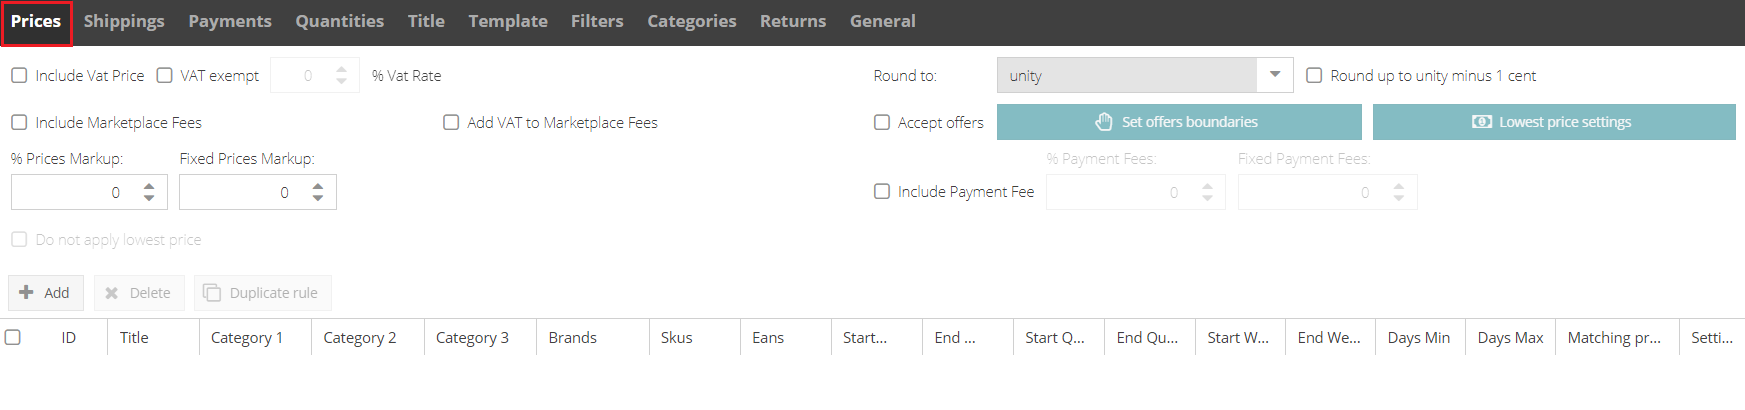 |
Listed below are the fields to be filled in and the options that can be enabled in this tab (varying depending on the marketplace/e-commerce site)
a. Adding VAT to the price
To add VAT to the price, flag this section and indicate the VAT percentage, if applicable.
Bear in mind that prices upstream of listings are generally exclusive of VAT.
But if, upstream in the catalogue, there is a column with a value stating the VAT percentage, do not flag this box: the system will add the VAT to the final price in the catalogue.
b. VAT Exemption
The VAT exempt flag must be activated when your sales fall within the VAT application mechanism, governed by the Italian Presidential Decree no. 633/1972, in art. 17 paragraphs 5, 6 and 7, by virtue of which the supplier of the goods or the service provider are not required to charge VAT on the invoice.
For more information, we recommend contacting your trusted accountant.
c. Adding Marketplace Commissions
This box allows the system to add the commission charged by the marketplace/e-commerce site to the final price based on the product category of each product.
d. Adding VAT to Marketplace commissions.
If this box is ticked, the system will add VAT to the commission charged by the marketplace.
N.B.: If you are registered in the VIES, do not flag this box.
e. Rounding off
You can choose to round the price to the decimal place (e.g. € 11.70) to the unit (e.g. € 12), or to the unit minus one cent (e.g. € 11.99).
f. Percentage price mark-up and fixed price mark-up
You can enter a percentage and or fixed mark-up to be added to the list price.
To apply a discount, enter a minus sign in front of the mark-up (e.g. “-5.00”).
All calculations are made using the catalogue currency.
At the time of submission, SellRapido converts the amounts to the currency of the target marketplace. For this reason, fixed mark-ups must always be in the currency of the listing.
Shipping
In this tab you can enter the rules to be applied to shipments.
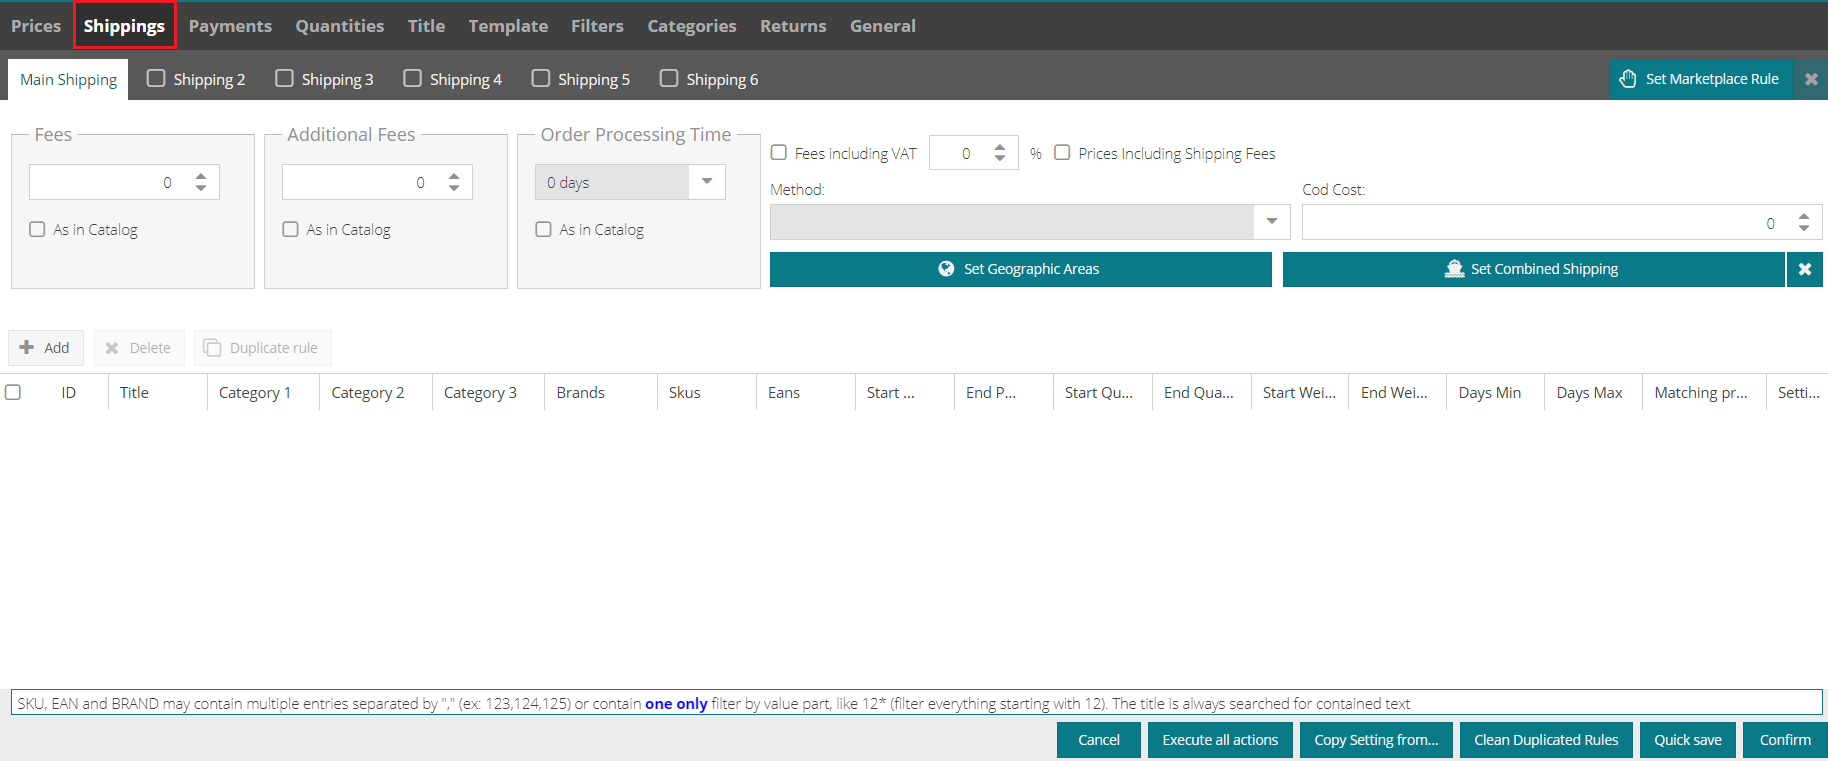 |
The fields to be completed and the options that can be enabled are listed below:
a. Fees
If the shipping cost details are present upstream in the catalogue, flag the box Taken from listing. Otherwise, enter the amount of the shipping costs manually.
b. Order Prep. times
If the shipping time details are shown upstream in the catalogue, please flag the Taken from listing box. Otherwise, enter the data manually
c. VAT inclusive fee
Flag the VAT inclusive fee option and enter the percentage of VAT if applicable.
d. Prices include shipping costs
If the shipping price is net of VAT, flag the Prices include shipping costs option if you want to move the shipping cost onto the final price. This will prevent the customer from seeing the actual cost of shipping.
Payment
In this tab, for marketplaces where this option is available, you will be able to choose the payment methods available to place your order.
Quantity
On this tab you can set the quantity of products that will appear in the ad.
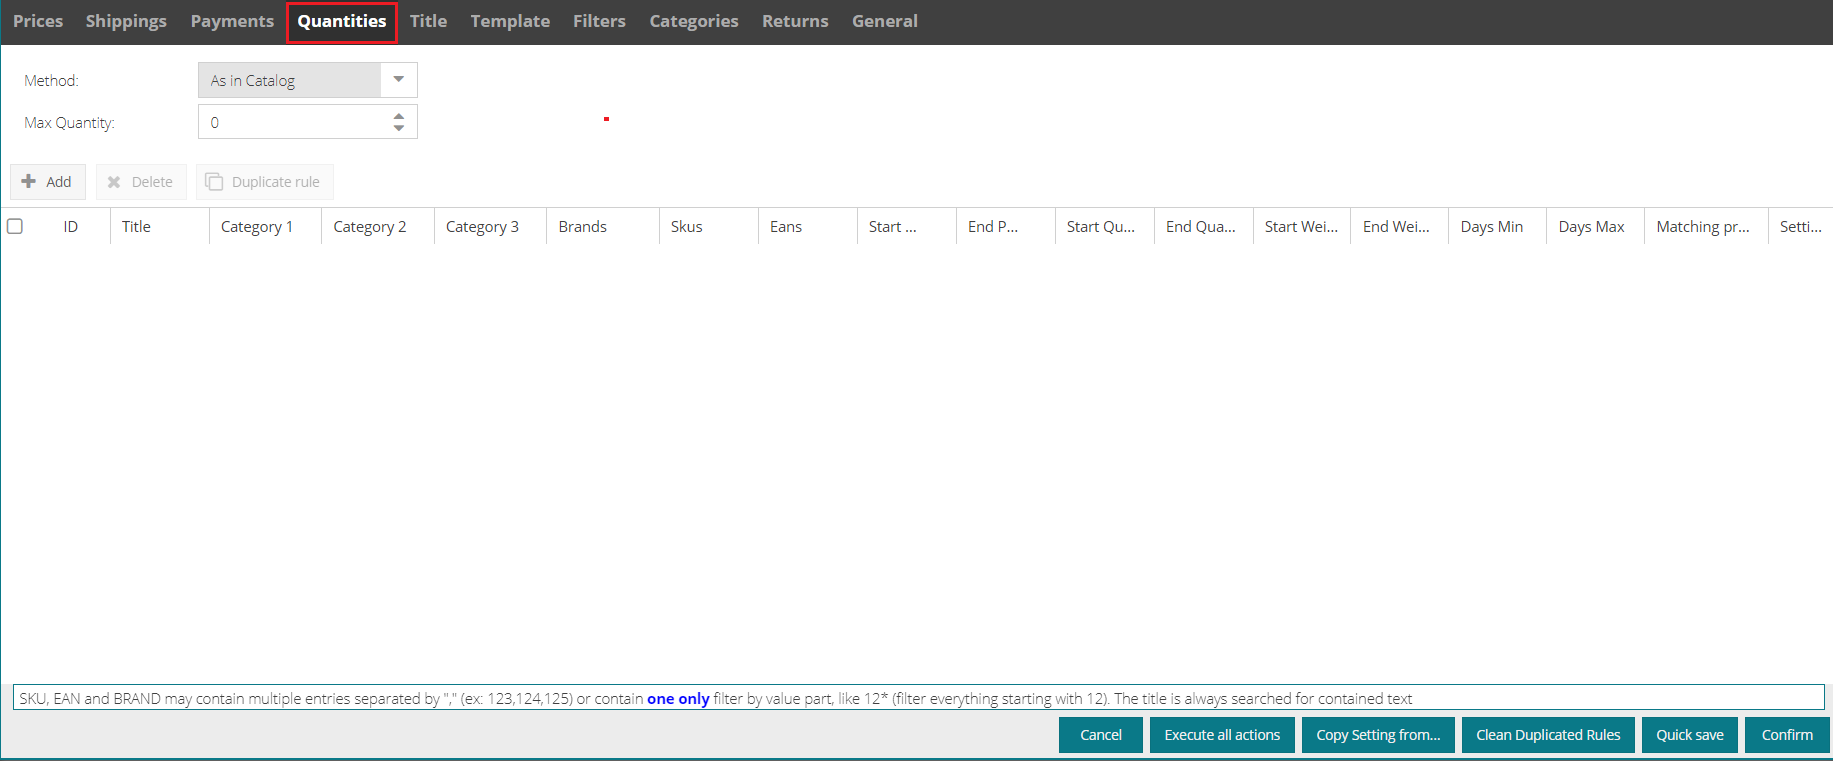 |
There are 3 ways to manage this data (selectable from the Method drop-down list ):
1. import the quantities from the listing
2. set a fixed quantity by entering the number of pieces to be displayed in the field.
3. set a random quantity to publish a random quantity within the range of the two numbers entered in the two boxes.
You also have the option to set a maximum quantity of pieces to be displayed in the ad.
Title and Template
In this tab, for the marketplaces that allow it, you can customise the title and description of your ads. Click here to read the complete guide on the Title and Template tabs.
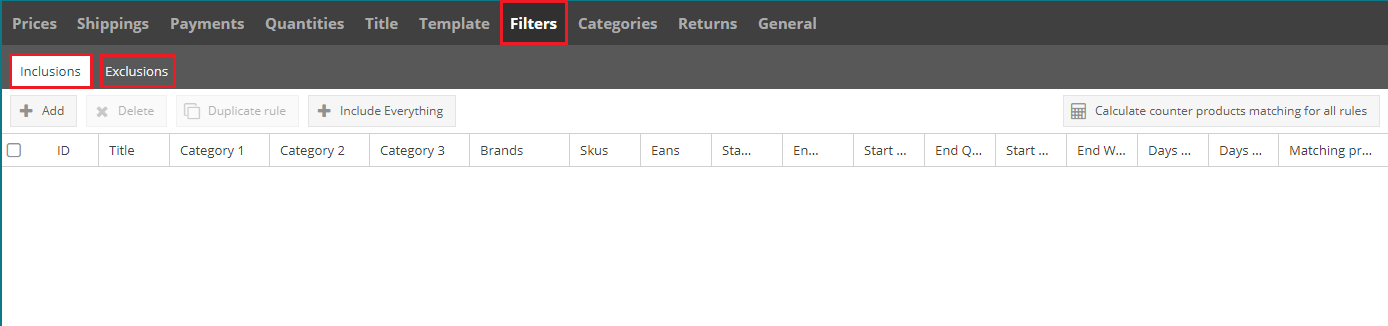
Filters
In this tab you can finalise publication on the sales channel by setting filters to include or exclude certain products from publication.
To see in detail how to do this, go to the section Publishing the catalogue.
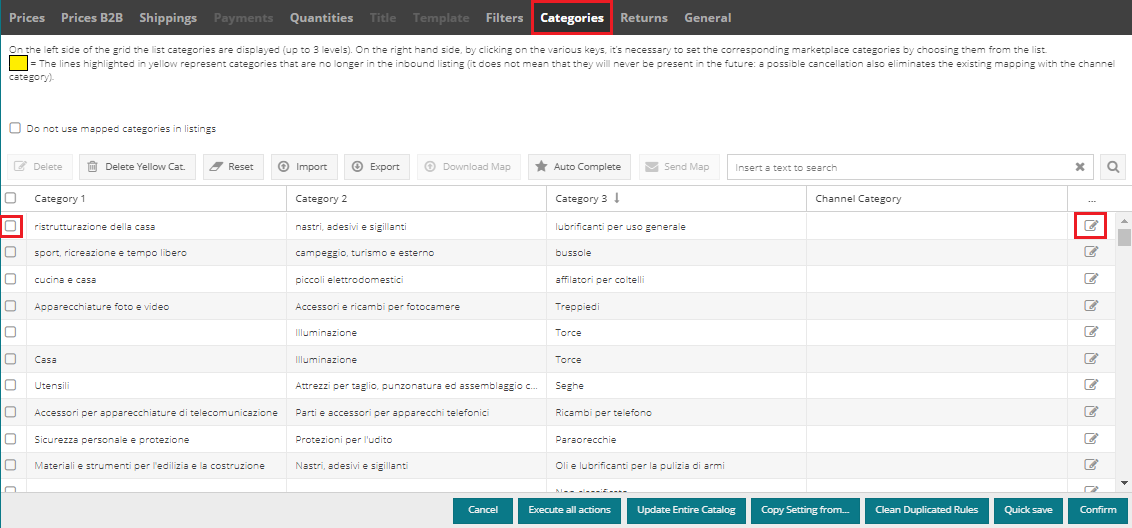
Categories
In this tab you must associate Categories 1/2/3 (i.e. those in the upstream list) with the Channel Category (i.e. the category in use for the sales channel you are publishing on). The latter allows SellRapido to calculate the commission provided by the marketplace / e-commerce for a given product category.
N.B.: the marketplace commission calculated via the channel category is the one that will be applied when calculating product prices via the Add Marketplace Commission button (see step 2c of the Prices section).
Great care must therefore be taken during this step in order to correctly set up the channel categories.
Below we see in detail how to associate upstream listing categories with the channel category.
Associate channel categories
1. select one or more rows of categories by flagging the relevant box
2. click on the button ![]() on one of the selected rows
on one of the selected rows
 |
3. choose the channel category that best fits categories 1/2/3 and click on the arrow ![]() to set it.
to set it.
 |
If you selected several rows in the previous step, the same channel category will be set for all the rows selected.
4. When set, click on Confirm at the bottom right corner to save.Returns
On this tab, for marketplaces where it is available, you can set information on how goods can be returned.
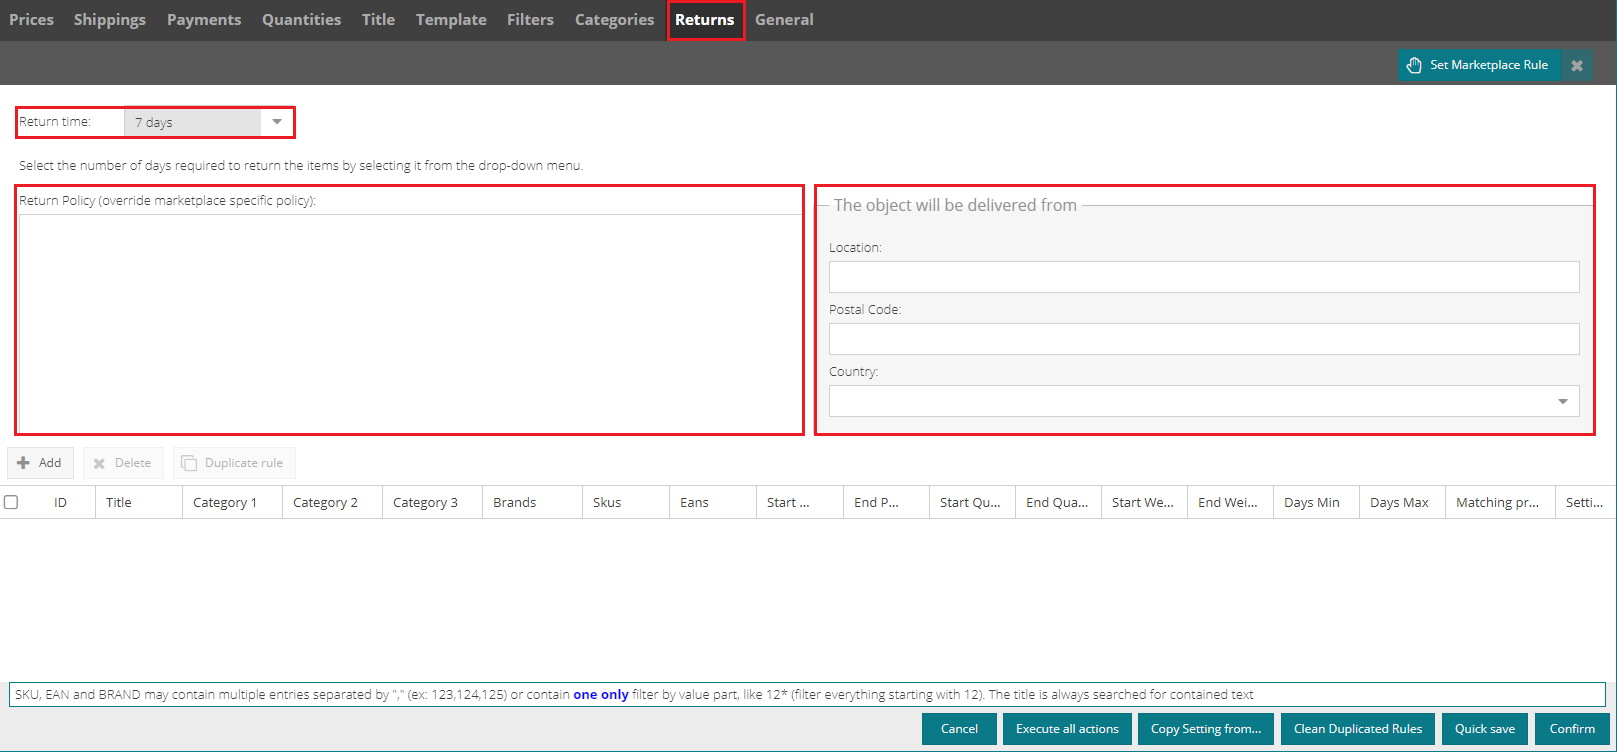 |
Publishing the catalogue on a sales channel
As explained in previous sections, a catalogue is published by inserting an include filter.
In the Filters tab, Include or Exclude filters must be set to identify which products to publish and which to exclude from publication.
 |
Products can be filtered under the following parameters:
- Category 1 and/or 2 and/or 3
- Brand
- Individual or Groups of SKU
- Individual or Groups of EANS
- Price ranges
- Weight ranges
- Order preparation day ranges
Products on the listing that match the Include rules will be published, while products that match the Exclude rules will not be published.
To create a new rule, click on New and set the parameters to filter the products.
N.B.:
The insertion of a total inclusion filter is strongly discouraged.
We advise you to publish products at a gradual pace, especially if the marketplace account you are using has just been opened.
Example
In the example in the image below, the Category 1: Casa e Cucina, Category 2: Cucina e tavola, with a price between € 0 and € 100; the rest of the listing will not be published.
 |
To include or exclude products of different brands, enter their names (including any spaces, e.g. Infinity Light) in the Brands field, separating them with a comma.
N.B.: there should be no spaces before and after a comma.
Example: canon,infinity light,zyxel
Checking the ad reports
After publishing a catalogue, it is essential to monitor the Ad Reports to check the status of publications.
This is a very important step, as it will allow you to uncover any errors and make the necessary changes for successful publication of products.
Click here to read the guide on checking your Ad Reports.